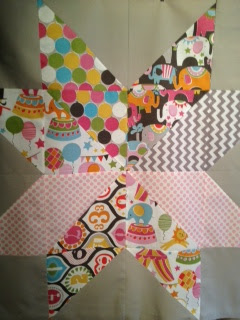
Monday, July 15, 2013

Weekend sewing and Blogger Blog Hop Week 6


Baby Jane Churn Dash
Yesterday I locked myself in my new sewing room and sewed all day.  It was glorious.  I put on Downton Abbey and had a wonderful time.  I am now all caught up on Season 3 of DA.  Sigh.  I ♥ it...and Mr. Bates.  I ♥ him too.

I sewed sporadically, moving from project to project.  I couldn't decide what I wanted to spend my time/day on.  So I did a bunch of things.  I started with some Churn Dash blocks...my first ever!  They are so fun and addicting!  I used this tutorial from the Missouri Star Quilt Co.  If you haven't ever tried a churn dash, this tutorial and technique is SO easy.


Crayon Wallets
I also made some more crayon wallets.  Since the move and not doing them for a while, I sort of lost my rhythm on how I make these.  So it took me a bit to get it together.  I also decided I needed a bigger size pocket for the notebook because the crayons made little teensy crayon marks on the crisp white paper and it was bothering me to no end.  So I changed it up a bit.


Enter in the new and improved Crayon wallet!  Yay!  Laminated of course. ;)

Here is a sneak peek at the new sewing space if you are interested. 

My sewing heaven ♥

Out my window, there is a pasture with horses and a little river going through the ravine in our backyard.  It's so peaceful and pretty to look at when I am ironing. :)


The Depot sign is from my Grandparents farm.  It is being sold and there are tons of old barns and stuff to go hunting in before they tear everything down.  It's very sad and breaks my heart, but it has to be done.  I could spend hours and hours there.  I found an old mason jar (by the Depot sign) and another tiny jar.  We   I need to find something pretty to put in them.  I took the sign home and cleaned it off and I put a light coat of clear lacquer on to protect it.  My aunt said that there used to be a bus stop right by the farm that they would deliver goods to back in the days.

I had also been hunting for MONTHS for an old antique ladder to hang my quilts on.  I had asked my aunt if she could be on the lookout for one.  She emailed me not even two days later and said she had found one!  I was SO excited.  She said it was gross and probably not what I wanted but I was welcome to check it out.  So we went out there one Friday afternoon and the moment I saw it, I lost my mind!  It was exactly what I had been looking for, exactly what I envisioned, and not only that, it was a piece of my heritage, a piece of my Grandparents that I could have forever...mixed with my love of quilts!   My aunt was so funny, she just kept asking-are you sure??  YES!  I am sure!  I ♥ my quilt ladder to NO end.   I promise to get a post on the quilt ladder later, when I find the perfect place for it and get it all up and displayed.

Anyway - can you believe we are now on Week 6 of the Blogger Blog Hop?  Time flies!
Take a look at these blogs and get acquainted!  There are some lovely projects and photos!


Week 6
Anne @ PlayCrafts
Cath @ Wombat Quilts

Wednesday, July 10, 2013

Q3 Entries

Hooray for Quarter 3!  I am pretty proud of myself for finishing the projects I completed for Q2.  I honestly didn't think I'd make it.  So, because that was such a jump start for me and the push in the right direction, let's join up with Q3 shall we?

After moving I found these lovelies that have NOT been finished...or even given a chance! GASP.  I'm so ashamed to say there is even a full quilt, quilted and not even trimmed up-just waiting for binding!  WTH was I thinking!  I've never allowed myself to never finish a full quilt...blocks, yes...I am notorious for starting blocks and never finishing them, let alone even GETTING to quilt-top status.  Sigh.

So, without further ado-here is the line-up of what we are going to get finished this quarter!  Rain or shine!


Granny Squares
Entry #1:  Ahhh, lovely Pam Kitty Morning Granny squares.  I love them.  So sad they've been neglected. Meow.

Large Chevrons
Entry #2:  Large Mermaid Chevrons.  As you all know, my favorite line is Out to Sea.  Sarah Jane is my favorite designer.  Whatever she makes, I'll buy it with open arms.  I need her autograph.

The Wonky Neighborhood
Entry # 3:  The Wonky Neighborhood.  The quilt that never made it.  So sad.  My friend Kristy and I went to a class at our LQS two summers ago!  Wow.  It was doing wonky houses, fussy cutting and sewing them on.  SO much fun.  I had a blast putting these together.  So why didn't I finish it?  You got me.
I love the little deer in this block.  Sew Sweet!
So, there we have it folks!  My 3 entries for the Quarter 3, hosted by Leanne!  Yay!
What are you working on?

Linking up to:  Let's Get Acquainted

Also, here is the lineup for the Blogger Blog Hop Week 5!  Make sure you stop by and meet some new friends!
Christa @ Christa Quilts!
Stephanie @ Quarter Incher


♥

Tuesday, July 2, 2013

Blogger Hop Schedule

Eeeek!  I'm so late on this - darn you moving fiasco!

Here is the Blogger Blog Hop schedule for the last two weeks.  Check out these ladies and their awesome blogs!  :)

Friday, June 21
Leigh Anne @ Ella's Cottage
Stacey @ The Tilted Quilt
Sarah @ Quilt Candy
Jackie @ NW Patchwork
Erica @ Happy Fabric
Stephanie @ Simple Sewendipity
Lauren @ Seraphym

Friday, June 28
Green @ So Sew Green
Gwendellyn @ The Rainbow Revolts
Jessica @ Stitched In Thyme
Kathy @ Kayak Quilting
Michelle @ Factotum Of Arts
Kris @ Sew Sunshine
Camilla @ Faffling

♥

Q2 Finish-a-long Finale!


Yay!  I made it. Phewsh.  Luckily I finished all 3 of my projects I wanted to enter in for the finish-a-long BEFORE we moved.  For more info on the Finish-A-Long, check out Leanne's blog here.  Today I am finally linking up my finishes!  I'm so excited to be back online!

Here is the link to my original post.  I had 3 UFO's I wanted to get done. To recap, here they are in their unfinished glory. ;)
Big Top

Suck it, Cancer

Quilts Beyond Borders donation
Okay...and here they are finished!
Big Top
 I love this fabric and I think it turned out SOOOO perfect with the black stripe-y binding!!  That binding makes me swoon!

Suck it, Cancer
I love how this turned out.  I had some major dilemmas on the quilting.  I didn't want to take away from the message I was conveying with the quilt blocks.  So I did some simple straight line quilting, then I quilted flowers around the border and on the side of the header block.  When I washed it and it came out of the dryer, I heard angels singing. ;)  I love it.  The Cuzco line was perfect for this quilt too. 

Quilts Beyond Borders Donation

Quilts Beyond Borders Donation - back
This quilt has been sent off and is hopefully on its way to some kiddos in another country.  This was definitely a feel good project and I highly recommend doing one if you can. Here is the link for their website.  They highly suggested using scraps or leftover fabric.  I had these blocks made for something then ran out of fabric and a year or two later, the fabric is obviously gone.  So I had to find some coordinating fabrics. I think it turned out OK.  I like the soft cotton flannel on the back - I wanted something fun and the apples are so cute.  I really had to go out of my comfort zone on this one - the non-matchy matchy-ness gives me a stroke, but I had to follow orders. :)  And it is for a good cause so I had to tell myself to get over it. Haha.

Anyway-I am working on unpacking my sewing room.  If I had my way, that would have been the first thing to unpack, but I guess these people think the kitchen and food is more of a necessity?  Crazy people. ;)

♥

Tuesday, June 18, 2013

This weeks Blogger Hop

Welcome to this week's New Blogger's Blog Hop!

You will find some fabulous tips and inspiration on these blogs.  Check out their posts on the blog hop!

I'm moving next week, so the blog may be a little neglected. :(  Sniff.  Hopefully its smooth sailing and I'll get back to our regularly scheduled programming!  Be sure to check the main list for all the upcoming weeks posts for the blog hop as well.

In non-quilty news, I had just enough time to finish some bare wood dressers we got from IKEA.  I painted them and they will be used as His and Hers nightstands!  I love them.  Turquoise is my favorite color this year and I'm redoing our bedroom to suite it.  Figured I might as well redo our bed and everything - new house, new bedroom stuff right?  It only makes sense. ;)   I'll get some better pictures once I have everything put together.


And, because I have nothing else to report, I leave you with a Pug face to brighten your day.   Or maybe she just brightens my day - that's ok, pug mugs aren't for everyone.  She's still adorable to me. ;)
♥

Wednesday, June 12, 2013

How to Laminate Fabric

What you will need:
Iron-on Vinyl (see my other post here for where I get mine)
A protector of some sort for your ironing board.  I happen to use a flat rate box from the post office.  It's all I had laying around. ;)  You can buy a Teflon sheet to lay down if you desire.  But you definitely want something to protect your ironing board.  Flat rate boxes work great. ;)
Fabric
Iron - NO STEAM! EVER! 

**I really apologize for the phone pictures-I had to make this for a customer last night and in the mess of moving, I cannot find my camera.  So please forgive. :) **


Iron your fabric and starch it.  Make sure there are no threads that have found their way to the front because they will be vinyled on for eternity if they are there! 

Cut your piece of vinyl to size to match your fabric. 

Carefully peel the vinyl off the backing and lay it down on your fabric.  It's really not that sticky so if you need to move it, it's easy to do so.  Smooth it down and remove any air pockets.
**Keep the backing from the vinyl!!!!**

Lay your fabric face up and place the backing that you saved on top, smooth side down so the little grids are face up.
I keep a bunch of big pieces and lay them side by side to make sure the piece I am working on is covered entirely.  You do NOT want this stuff on your precious iron.
You will need to press your iron down in each spot for 8 seconds.  Count to 8.
1.2.3.4.5.6.7.8
K-now move to the next spot over.  Make sure you iron each spot on your fabric.  Use the grid on the backing as a guide.

When you are done with the front, take the backing off, flip the fabric face down and put the backing back on.  Now, you need to repeat the ironing process, but this time, you only need to count to 4 for each spot.
1.2.3.4

Don't burn yourself. If you want to see my burn, it's on Instagram...and it's nasty. So you might not want to. I understand.

How did they come up with these times?  As I am counting, and repeating this process over and over, I've thought about this.  I think it's a safe number because I'm fairly certain there are many spots I have not counted a full 8.  So perhaps it's really 5...but 8 is safe for people who are inpatient like myself. ;)

Now you have your pretty vinyled fabric!
When it's warm it kind of feels like a fruit roll-up.  A hot fruit roll-up left in the car.  Once it cools down, it stiffens up and no longer feels fruit roll-up-y.

Now for the sewing part.

Vinyl is slippery, yes.  Some websites I ran into state you need a fancy schmancy Teflon foot.
Really?  No.  That's my opinion.  I honestly can't see why you'd need one.  Your project slides through the sewing machine very easily and  I've used my regular old foot and have had no problems.
However, you do NOT want to pin this down to your other fabric. It will leave holes in your nice vinyl, so use clips.  I happen to have just purchased myself some Clover clips from here and I LOVE them.
Best invention ever.  They really grip my slippery vinyl and keep things in place whilst I am sewing.

You will probably want to replace your  needle too after sewing a few projects with vinyl.
Also, take it slow - if you are finishing your piece and sewing the edges, just go slow.  Especially around thick pieces like pockets.

Okay, if you are doing a project that requires you to turn it inside out like my crayon wallets, never fear.
When you turn it inside out your vinyl will be a crinkly hot mess.  Don't panic!  I promise it will be ok.

Flip it inside out and turn your project over to the regular fabric side.
Iron away (No STEAM!).  It will smooth out all the crinkles in the vinyl and it will look like new again.
If you make the mistake of using steam, it sort of fuses your vinyl to any other vinyl it is near - like my pockets...fused pockets are no bueno.  (yes, this did happen to me) :(


 See?  Pretty vinyl with no crinkles.  This stuff is pretty cool.
It just takes some time and patience (which I am working on as I am pretty much the most impatient robot on the planet).

I found the tutorial for the crayon wallets here.  It is a great tutorial. I changed it a bit, obviously adding vinyl and I made them a little bigger.
I would LOVE to see what you create if you use my tutorial.
Please leave a comment with your link if you make something!!

Hopefully this helps.  If you have any questions, let me know!

Happy sewing!
♥

Monday, June 10, 2013

And then there were three


Well, I've made 4 actually - but Robot Child #1 took the first one I made. :)
Laminated Crayon Wallets

Elephants on Parade

Fish School

Soft Kitty, Warm Kitty


I figured out doing these in assembly line fashion, works best.  Laminating fabric is really not that hard...shocking I know.  Once I figured out how to do it,  I was surprised at how easy it is.  It's just time consuming is all.  So, I cut out all my pieces for the wallets I am going to make, then cut out my iron on vinyl.  For all the inner pieces, I start the laminating process for each one.  Then I set them aside until all the pieces are laminated.  Then I resume putting them together.  For me, this works and I get less frustrated by how long it is taking! 

You can find iron-on vinyl by Heat Bond at Walmart or Hobby Lobby.  JoAnn's says they have it online, but when I went to my local store, they didn't know what I was talking about, and didn't have any.  Must be an online thing only - or my JoAnn's is just lame. ;)  The Internet also says you can buy it in a package, wrapped up for 2 yards.  I haven't been able to find that either - just by the bolt.   I eventually got tired of searching for it, so I just bought the rest of the bolt my Walmart had and called it a day.  Hopefully they order more - cuz I'm sure I will need some more in the future. ;)

These are fun to make and I am loving all the cute fabric combinations I've been finding.  I bought another armful of fat quarters at my local quilt shop.  They need some shopping carts or baskets, cuz really, it's hard carrying around a ton of fabric.  Maybe I just need to enlist a strong man I know to carry all my fabric for me.  Yah-that will never happen. ;)

Edited to add:  I'll be doing a tutorial on how to make laminated fabric coming up shortly.  Stay tuned!!

♥

Linking up to:
Quilt Story
Better off Thread