Monday, October 17, 2016

Heartland Blog Tour!


YAY!  Today's the day!  I finally get to show you my quilt and extras I made for the Heartland Blog tour!  I was so elated when I was chosen to be on this tour.  I adore Art Gallery fabrics and Pat Bravo makes the cut when it comes to amazing fabric designers!


This fabric is so dreamy.  I love all the prints!  I decided to use the yellow mustard colorway.  Those colors are totally my fav right now.  I'm loving pinks with mustard, and florals??  Even better.  But of course, those owls are my most fav. It all makes my heart so happy!

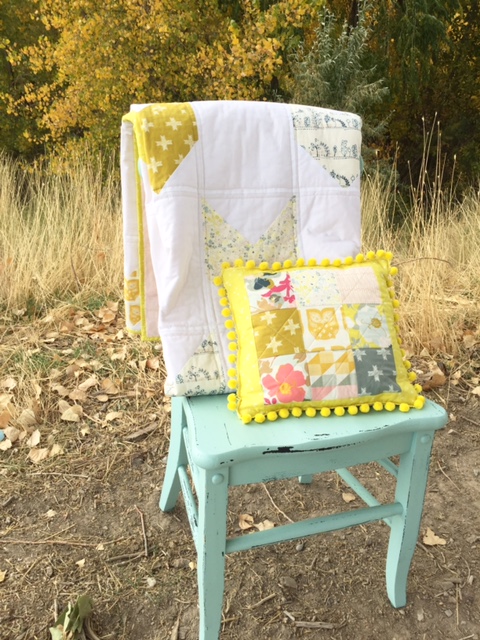
First, lets start with the extras I made.  Using all the scraps left from the quilt, I made a pillow with pompom trim (of course!) and a note book cover.
                                     

I found this awesome chair over the weekend, and I had to snatch it up.  It will go in my sewing room with the pillow sitting on it.  I think they compliment each other perfectly!


Using simple 3.5" squares and a border, I quilted it diagonally.  I LOVE how it turned out. The owl print of course had to be front and center. ;)


I made the notebook cover with a ribbon tie.  SO easy and functional.  My daughter keeps trying to steal it.  This one is mine!

Are you ready for the quilt?!?  Here it is!  I named this quilt Trekken.  ♥


I LOVE how it turned out.  I used a pale pink minky back, which is scrumptious and compliments this fabric wonderfully.  And I'm in love with that neon yellow print so much I had to use it for the binding.


This fabric was SO fun to work with, I loved playing with all the different prints and colors.  It's totally me!  I hope this inspires you and go run out and get some!  

And guess what?!?  I've got a free PDF of my pattern just for you!  I can't wait to see your version!  If you make it, please use the hashtag #trekkenquilt!


CLICK HERE for the PDF:  Trekken Quilt


A HUGE thank you to the fabulous Pat Bravo for giving me a chance to use her pretty fabrics in my quilt.  I drooled over these fabrics the moment I got them!  This quilt will be a long time fav of mine. A giant big thank you to Art Gallery as well!  You are both my favs!!!

Now, don't forget to check out the other awesome ladies on the blog tour.  I got to share my day with my new bestie Haley from @happinessinthemaking!  I love her guts.  She's so sassy and fun and makes GORGEOUS quilts.  Her Instagram feed is DELISH.  Go check her out, follow her and you won't regret it.  Her gorgeous Starflake quilt can be found here: happinessinthemaking.

The full tour schedule is here: patbravodesign  and while you are there, check out that Look Book!!  I die!  


PS:  I'll be doing a giveaway on my Instagram account tonight!  Don't miss it!

xo,
Kim


Monday, April 13, 2015

Stash Busting Blog Hop - Retro Mama!

Description: LIONSTD:Users:johnsr:Desktop:BLOG HOPS:Retro Mama:retro mama banner IG.jpg


I am SOOOO excited for my turn on the blog hop!  Like, giddy, hopping up and down, rainbows and unicorns flying all around me excited!  Can you even stand it?  I can't!

So, in case you haven't heard, Retro Mama wrote a super cute and WAY inspirational book.  I was so excited to be asked to be part of it, but when I sat down to decide what I wanted to make, I honestly wanted to make ALL of it.  I ended up making 5 items and still didn't get to what all I wanted to make!  So, I will be making more! 

Kim's (Retro Mama) instructions are SO easy to understand. The pictures are uber helpful and well done.  I have a really hard time reading/understanding patterns, so for me to say this book is super easy to follow, it's 100% true and you've gotta believe me.

Here are my projects I made.


Kim's book has a darling pattern to make hoop art,  Isn't that cloud so sweet?


I really wanted to make this, but I decided to put it in a mini quilt version.  Here is mine:


It was so much fun to make and incredibly easy.  I made this yesterday....I know, waiting till the last minute!  Oldest Robot Child tried to get dibs on this. Nope!  This is mine!  A black and white stripey binding is my favorite and will be the perfect addition to my sewing room.  ♥


Next up was the pleated pincushion.  NOW....let me tell you,  I sucked at making this. Not because the directions weren't clear or it is super hard, but because personally I suck at pleats and circles.  I acknowledge this and own it.  Why I tackled this I don't know (overachiever?) but I love the look of it and wanted to use my Milk, Sugar and Flower fabric for it.   It's beyond perfect, but I love it still. And I might try to tackle it again after I practice on pleats more. ;)  For now, it's holding my yummy donut pins that make me want a donut every time I look at them.  Mmmmm donuts.


Next up, I made two versions of the Simply Strippy Sewing Kit.  I LOVE how you can totally make this your own, be creative and put all your flair and trims inside!   I am a little obsessed with trims. So this was right up my alley. ;)


You all know my adoration and love with Cotton + Steel.  SO - I decided to make a selvage version and a B&W (with a hot pink kitty thrown in) version.


It's hard to pick a favorite. I love selvages, but I love that hot pink kitty.   ♥  I will probably make more of these. They are just too fun.

Okay, my last project was the Bright as a Button makeup pouch.  In octopus of course. ;) Again, more C+S.  I didn't want to put buttons on mine, so I just stitched some "X's" instead.  This pouch comes in 3 sizes!  I love that you can make your own size.  I don't like itty bitty pouches and love that this version is pretty roomy, no matter what size you pick.


I highly recommend this book.  I honestly love everything in it and I think you will too.  ♥

Stitch Craft Create is hosting a giveaway too!  Enter to win a copy of Scrap Happy Sewing AND 50 Fat Quarter Makes along with some fabric too!  

books and fabric giveaway


Don't forget to check out what these other awesome bloggers have made!

APRIL:

Thu 2nd  - Retro Mama
Tue 7th  - SCC
Wed 8th  - S.O.T.A.K Handmade
Thu 9th  - Fabricworm
Fri 10th  - Clover & Violet
Mon 13th  - Robot Mom Sews
Tue 14th  - Vivid Felicity
Wed 15th  - Cut To Pieces
Thu 16th  - Straight Grain
Fri 17th  - Sew Take A Hike
Mon 20th  - Vintage Grey
Tue 21st  - Miss Print
Wed 22nd  - Pink Penguin
Thu 23rd  - Sew Creative Blog
Fri 24th  - Follow the White Bunny
Mon 27th  - A Bright Corner
Tue 28th  - Sew Justine Sew
Wed 29th  - LRstitched
Thu 30th  - Pieced Brain
 ♥


Tuesday, March 31, 2015

Stash Busting Blog Hop!


Description: LIONSTD:Users:johnsr:Desktop:BLOG HOPS:Retro Mama:retro mama banner IG.jpg


Hi friends!
I haven't blogged since December! Oooooh holy slackerness.  Well, I'm on IG a lot. Instagram has taken over blogging. It's sad.  BUT, I am SUPER beyond excited to be part of this blog hop with Retro Mama!  It's so exciting!  Have you seen her new book?  It has SO many fun projects, I want to do all of them!
retro mama scrap happy sewing

I will be making a few projects to share.  Here is the lineup. Check out all the awesome peeps involved!


APRIL:

Thu 2nd  - Retro Mama
Fri 3rd  - SCC
Wed 8th  - S.O.T.A.K Handmade
Thu 9th  - Fabricworm
Fri 10th  - Clover & Violet
Mon 13th  - Robot Mom Sews
Tue 14th  - Vivid Felicity
Wed 15th  - Cut To Pieces
Thu 16th  - Straight Grain
Fri 17th  - Sew Take A Hike
Mon 20th  - Vintage Grey
Tue 21st  - Miss Print
Wed 22nd  - Pink Penguin
Thu 23rd  - Sew Creative Blog
Fri 24th  - Follow the White Bunny
Mon 27th  - A Bright Corner
Tue 28th  - Sew Justine Sew
Wed 29th  - LRstitched


I hope you join me and all the others for this super fun blog hop!  See you there!


Thursday, December 11, 2014

Joy Holiday Pillow Tutorial

 Hello and Good Tidings!

Today I want to share with you my 'Joy' pillow.  I'm making these for Christmas gifts and it is beyond easy and quick!


This pillow was my original, that I made last year.  It's a little different than the ones I'm doing this year, but here's an idea of what you could do too.  This version has a 'quilt as you go' border around it.  This years pillow doesn't have that.   The font for the JOY was  'Moderne Caps'  that I downloaded from Fonts.com for the above pillow.

So, onto the tutorial.  Now I didn't take a whole lot of pictures so sorry about that.  If you have any questions, let me know. :)

Supplies:

  • I picked out 5 different fabrics.  I used 3 for the block borders, 1 for the letters and the last one for the back.  I got a 1/2 yard of each - except for the backing, I got 1 1/2 yards.  I've made 3 pillows so far and I have lots left over.
  • White fabric - I have some one hand so I'm not sure how much, but I would say maybe a 1/2 yard, depending on how much you want to make.  Vague, I know. Sorry. :(
  • Pillow form - 12" x 16".  I got mine from Joann's.
  • Double sided interfacing


Pick which 3 holiday prints you want for your borders - or you can certainly use them all!
For the tutorial, it is based on 3 fabrics.

Cut 2 strips from each print, 2 1/2 inches wide, by the length of the fabric.
Sew together your 3 strips (1 per each print) - however you want them laid out.
(You will need about 1 1/2 strips from each print to make 1 pillow)
Press to one side.
Take back to your cutting table, and cut the strips again, 2 1/2 inches.  Cut as many as you can get from your strips to equal 2 1/2 inches wide.

Sew the 2 1/2" blocks together by chain piecing.  Sew together in sets of 6 blocks per set.   Press to one side.

From the white fabric, cut a piece about 12" by 8 1/2".  You may need to trim, depending on your blocks.


Now, take your sets and sew one strip to the top and bottom of the white piece.  Press away from the white.  You may want to alternate the strips so the ending piece isn't the same as the top piece.
So - see my picture above?  On the left hand bottom side, the green peppermint print starts the  bottom row, and the candy cane print on the top row.  This will help to alternate prints when you sew on the side pieces.

Once pressed, trim it up if needed.  Sew on your 2 side pieces, lining up your rows and making sure the prints don't repeat when they are joined.  Press away from the white.  Now, trim again and your ready to quilt it!

Get some scrap batting and use your method for basting.  I prefer 100% to spray baste.  Pinning makes me crazy.  So whichever way you want, baste your pillow top and use a spare piece of fabric for the back.  You can use muslin or in my case, I just used white fabric because I may or may not have a bolt of it lying around. ;)

Quilt as desired!  I mixed mine up and quilted them different ways, straight line quilting, cross hatch, matchstick - whatever you do, just have fun with it! 

Once you are done quilting, lets move on to the letters!

Pick a font you like.  For my new one, I'm not exactly sure what font I chose....I did a couple different ones...just pick one you like.  Bump the size up to about 400.  If the font seems big or small, adjust it to your liking.  Do a test print and make sure it will all fit in the white space.

Trace your font or print it via your fancy schmancy cutting machine.  I just got a Cameo and I'm still learning the ins and outs...and we aren't the best of friends yet, but we are getting there!

If you are tracing, make sure you are doing the font on the wrong side of your print, so it isn't backwards.  Apply some interfacing too.  I would personally iron on the interfacing first, then cut so you aren't cutting twice, cuz that's lame. ;)

Once you have your letters all cut, interfaced and pretty, lay them out how you like them placed, and iron into place.  Then applique them down!

K, now it's time to make the back piece.  I love the envelope style for my pillows.  It's super easy.
I also sewed a piece of spare lace trim I had to make it pretty.
There are lots of tutorials out there on making the envelope backings.


I cut a piece 16 1/2" x 18".  Cut in 2, at about 11 inches.  Fold down the long edges and iron at about 1/4" and then fold again.  Iron down and starch it.  Then sew it in place.  Then you can add any trims you want.  Again, I'm not going to go in depth for the envelope backing.


Pin in place, right sides together on your pillow front.  Sew a 1/4" seam around the entire border. Clip your corners and turn inside out.  Place in your pillow form and your done!

See?  Easy!

I'd love to see if you make one!  Find me at Instagram!  @robotmomsews


Monday, November 24, 2014

Busy busy!

Hello friends!
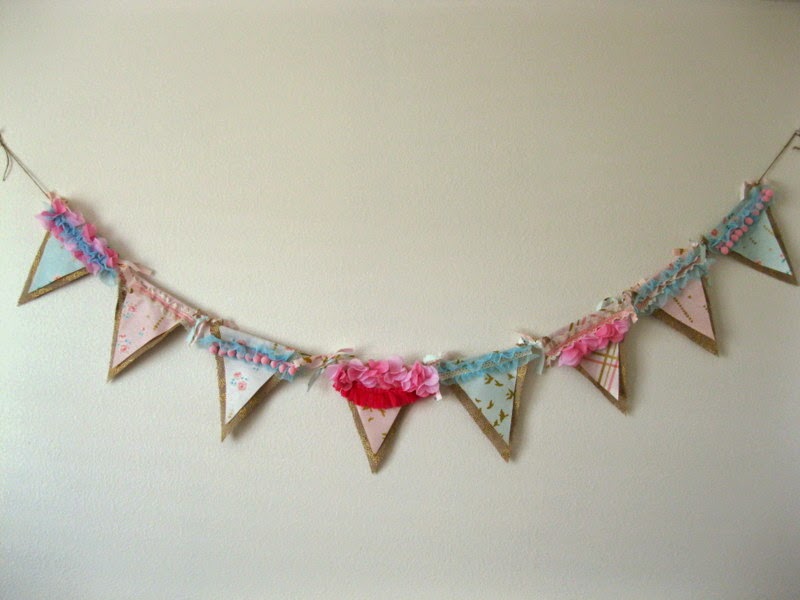
I have been so busy, just doing lots of stuff here and there.  Like my new buntings!


Littlest Robot child has a boy's room....there are airplanes on the wall and a baseball ceiling fan. Egads!  It's no bueno for a girlie girl.  So, we are working on changing that.  I've made a few things for her room to help liven it up and make it girlie.


We started by making this triangle Brambleberry quilt.  See the airplane peeking out above it?  :( Booooo.  I'm hoping to paint her walls on Christmas break.  Apparently I also need to get that 'fold line' out of the quilt, and get some better lighting.


The matching bunting is uber fancy with lots of trims and colors.  I love how it turned out.  We are making oldest Robot Child's room one too - purples with some Heather Ross unicorns...yah, stay tuned for that!  ;)


I'm offering these in the shop now - custom made, OOAK!

Hope you all have a great week and for all you USA'ers - Happy Thanksgiving!

Thursday, October 30, 2014

Modern Plus Baby Quilt


I've currently got 2 projects going on, simultaneously.  In waiting for my fabric to be delivered so that I could commence working on them, I decided to use some of my stash, and make a modern plus quilt.  Using my stash makes Robot Husband very happy.  :)


I backed this in some pink Wee Wander.  Love.


I have quite a bit of pink solids, but I decided to use this Raspberry bold pink one to make the pluses. It stands out quite well with the Wee Wander print.


I also used the solid for the binding. I must say, this is my first time using a solid as binding!  I love it!


Robot Child #2 asked if this quilt was going to be hung up in the hospital. :)  She's so funny.  ♥


Wednesday, October 22, 2014

On the Farm


Most recently I fell in absolute love with the On the Farm line by Riley Blake.  My youngest Robot Child is obsessed with piggies, so when we saw those cute little piggies I knew I had to make it.
This one isn't for her, but I will be making her a bigger version as demanded by Robot Child #2.


I love the colors in this line too.  I decided to go with a red candy apple minky for the back.  Ooooh, it's so delicious.  I can't keep my hands off it.  I chose a polka dot red to bind it with...I'm still not quite sure it pulls everything together, kind of wishing I would have gone with the green/pink plaid print for the binding, but oh well.  Too late now!


I cross-hatch quilted it, with red thread on the bottom, cream on top.  I am in love with how the quilting turned out on the back.  Altho I immensely hate despise the mess that minky makes, I have gotten over my fear of quilting with it.  It's really quite easy and I do love the end result.
I made myself a quilt a while ago (still need to show that) and I backed it with a grey minky.  This quilt lays on my bed and I sleep with it every night....I often find myself rubbing the minky like a 3 year old.  I just need my thumb in my mouth next. Haha. It's amazing.


Quilt Stats:
Simple patchwork
Fabric - On the Farm by Riley Blake
Measures approx: 36 x 42
Backed in Candy Apple Red Minky
Cross-hatch quilted
Inspiration:  Love of piggies ;)

Linking to:
Quilt Story
Blossom Heart Quilts
I have to say...